
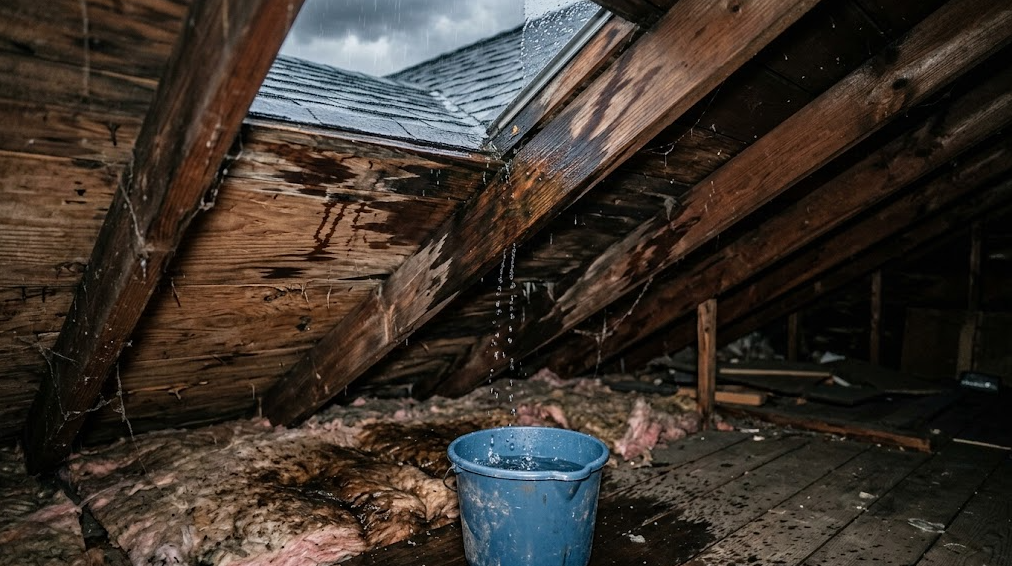
Key Takeaways
- If you are asking “why does my roof leak only when it’s windy,” the common cause is that wind turns ordinary rainfall into pressure-driven water that can move sideways, upslope, or into joints that stay dry in calm rain.
- Wind can lift an unsealed or damaged roof covering, drive water through vents or tight joints, strike chimneys and dormer walls, or exploit weak flashing, roof edges, soffits, siding, windows, penetrations, underlayment, and roof-deck joints.
- A windy-storm leak often exposes an existing weak point, though new storm damage can also be the trigger. The timing by itself does not settle which occurred.
- Wind direction, rainfall intensity, and the specific room or wall that gets wet offer helpful clues, not proof. Water can run along sheathing, rafters, trusses, framing, wires, pipes, ducts, or insulation before appearing indoors.
- Do not go onto a wet, windy, or storm-damaged roof. Avoid wet electrical fixtures, sagging or bulging ceilings, unsafe attics, and uncontrolled garden-hose testing.
- A lasting repair restores drainage and attachment as a system. Painting a stain or smearing caulk over an unknown joint is not a fix.
The Short Answer: Wind Pushes Rain Through a Pressure-Sensitive Weak Point
A roof may leak only during wind because wind changes how water moves. In steady conditions, rain falls on the roof and drains downhill over shingles, panels, tiles, flashings, and into gutters. With wind, rain can be blown sideways, pushed under laps, forced through vents, pressed into tight joints, or driven against vertical surfaces such as chimneys and dormer walls. That is why a home can remain dry in vertical rain yet leak when wind arrives from a particular side.
A sloped roof is a layered system rather than a single waterproof sheet. It includes the roof covering, underlayment, deck, fasteners, flashings, edges, vents, drainage, skylights, chimneys, wall intersections, and penetrations. FEMA’s guidance for high-wind conditions treats these pieces as interdependent because wind may disturb one component and expose a path for water at another. When homeowners ask why a leak shows up only in wind, the answer is usually found somewhere within that system, and it is not always directly above the ceiling stain.
Calm rain flows downhill, but wind can drive water sideways or upslope
Asphalt shingles, metal panels, tile, slate, and many low-slope materials rely on gravity drainage. They work best when water flows in the expected direction. Wind disrupts this by pushing water under shingle edges, into panel laps, behind siding, through louvered vents, or straight into the face of a chimney where small discontinuities can be exposed.
Roof geometry and exposure change the challenge. A coastal house, a home on open farmland, a tall two-story gable, or a slope facing prevailing storms may encounter rain angles that a sheltered roof seldom sees. That exposure does not guarantee a leak, but it determines which details get stress-tested.
Wind may expose an existing defect rather than create a new one
A leak during a windy storm does not automatically mean new storm damage occurred. The event may have activated a weak spot that already existed: an aging pipe boot, a lifted shingle tab, a missed fastener at flashing, a gap at a dormer sidewall, an open roof-deck joint, or a vent detail that only leaks under pressure.
New damage is also possible. Shingles can be loosened, creased, torn, or lost. Metal flashings can bend. Ridge caps, vents, fascia, and soffit panels can shift out of place. The key point is that timing alone cannot prove whether the issue is new or pre-existing. Patterns in wind direction, rainfall intensity, wet locations, and visible conditions help narrow the search, but they are not conclusive on their own.
The ceiling stain may be far from the exterior entry point
Water seldom drops in a straight line from roof to ceiling. It follows gravity, surface tension, framing, insulation, and air paths. After entering at the roof or wall, water may track along roof sheathing, rafters, trusses, purlins, top plates, studs, wires, pipes, ducts, and insulation facings before appearing at a ceiling joint, light fixture, window head, wall corner, or baseboard.
Moisture investigation guidance from ASHI notes that water follows the path of least resistance and that a visible stain may be offset from the true entry point. A stain near the center of a room, therefore, does not guarantee the hole is above that spot.
How Wind-Driven Rain Gets Through a Roof
Wind-driven rain gets in when three things line up: water, pressure, and a pathway. Take away any one of the three and the leak often stops. During a storm, all three can coincide, turning an inactive gap into an active leak.
Wind uplift can open shingle and panel edges
Wind does more than blow rain sideways. It also creates uplift at edges, corners, ridges, overhangs, and even in field areas. If asphalt shingles are unsealed, under-fastened, aged, cracked, or previously lifted, wind can raise their edges, allowing water to reach nail holes or the underlayment. On metal roofs, loose fasteners, open laps, worn sealant tapes, or shifted ridge and rake trims can form similar pressure-sensitive openings.
Tile and slate perform differently but have their own vulnerabilities. Broken pieces, displaced units, missing hip or ridge components, failed mortar, and underlayment deterioration can let wind-driven water reach the layers below the visible covering. Because each system drains and attaches differently, the roof type influences where and how leaks appear.
Pressure can force water through vents and narrow gaps
Roof vents are purpose-built openings to move air. That function introduces risk during wind-driven rain. Ridge vents, gable vents, soffit vents, off-ridge vents, gable-rake vents, and turbine vents can admit water when exposure is severe or the vent is poorly placed, poorly designed for the site, or installed without needed baffles and protections. A vent can behave well in ordinary rain yet leak once wind pushes water into its louvers, baffles, seams, or fastener penetrations.
Tight joints can act the same way. Pressure can push water into small gaps at counterflashing, siding trim, skylight curbs, plumbing boots, roof-to-wall intersections, or thinly sealed exhaust caps. From the ground, the gap may look insignificant while still being large enough to admit wind-driven water.
Roof edges and transitions receive concentrated exposure
Eaves, rakes, valleys, hips, ridges, sidewalls, chimneys, dormers, and skylights are not merely accessories. They are control points where drainage changes direction or multiple systems meet. Wind often concentrates pressure at edges and overhangs, and FEMA identifies roof edges, overhangs, vents, drainage, and openings as high-value details for performance in wind.
Transitions are frequent leak sources because many elements must work together. Consider a dormer sidewall: the roof covering, step flashing, wall drainage plane, siding, window trim, gutter, and kickout flashing all need to be properly integrated. If even one piece is missing, buried, or misaligned, water can bypass the intended path.
A secondary water barrier matters when the covering is compromised
Underlayment serves as a backup beneath many steep-slope coverings. On asphalt-shingle roofs over wood decks, it provides secondary protection, including help during wind-driven rain when the main layer is challenged. Self-adhering membranes can add targeted protection at eaves, valleys, ridges, hips, and penetrations when selected and installed to match the roof assembly.
Secondary layers do not make primary defects irrelevant. If shingles are missing, flashing is loose, a vent is broken, or a panel lap has opened, the main drainage plane still needs repair. IBHS testing has shown how sealed roof-deck strategies can reduce water entry after covering loss, but such measures must suit the roof type, exposure, local requirements, ventilation needs, and manufacturer instructions as part of a complete system.
10 Common Reasons a Roof Leaks Only When It’s Windy
Lifted, creased, loose, or missing shingles
Asphalt shingles depend on correct fastening, overlap, and sealing. If a tab is lifted or creased, wind can raise it and push rain under the butt edge, where water may reach nail penetrations, damaged underlayment, open sheathing joints, or the top of a wall. Missing shingles are easy to spot, while loose or unsealed tabs can be subtle from the ground.
Although most common on asphalt-shingle roofs, the same principle applies to other coverings. Loose metal panel edges, displaced tiles, cracked slate, or damaged ridge caps can create openings that become active under wind pressure.
Damaged or poorly integrated flashing
Flashing protects transitions and projections such as chimneys, skylights, walls, valleys, and penetrations. High winds can deform flashing and increase exposure to wind-driven rain. Clues include stains in the attic, ceiling stains, visible gaps, corrosion, debris accumulation, cracked sealant, and separations at roof or wall connections.
Integration matters as much as condition. Flashing must tie into both the roof covering and the adjacent wall or curb. A visible piece of metal on the surface does not guarantee water is being returned to the drainage plane.
Failed step flashing or kickout flashing at a sidewall
Step flashing protects where a sloped roof meets a sidewall. Kickout flashing directs water from that joint into a gutter at the lower end. If either is missing, undersized, hidden behind siding, damaged, or poorly integrated, wind-driven rain can enter the wall and appear as a roof leak.
This often occurs near dormers, second-story walls, chimneys, porch roofs, and additions. Some claddings stain quickly, while others, including vinyl, fiber cement, stucco, and brick veneer, can hide wet sheathing for some time.
Wind-driven rain entering a ridge, gable, soffit, or turbine vent
Vents can leak even when shingles are intact. Wind can drive rain through ridge, gable, soffit, off-ridge, or turbine vents, especially when the opening faces the storm or lacks suitable baffles, layout, or weather protection.
Do not block attic vents to stop a drip. Ventilation affects heat and moisture control. Repairs should reduce rain entry while maintaining safe, adequate airflow in line with local codes and the vent manufacturer’s guidance.
A chimney or dormer wall taking rain from one direction
Chimneys and dormers act like small walls during a storm. Wind pushes rain against faces, sidewalls, caps, trim, siding, masonry joints, and roof intersections. Water may enter through failed step flashing, loose counterflashing, corroded metal, deteriorated mortar, cracked caps, poor uphill drainage, or porous masonry.
Chimney leaks can be deceptive because water that enters high on the masonry can show up at a ceiling below, at the fireplace surround, on attic framing, or along an adjacent wall. Dormers create similar confusion, as windows, siding, trim, roof flashing, and gutters sit close together.
A plumbing boot, exhaust cap, skylight, or other penetration leaking
Every pipe, vent, flue, fan cap, satellite mount, conduit, skylight, and curb interrupts the roof covering. Wind-driven rain can exploit cracked rubber boots, loose storm collars, failed cap seams, damaged skylight flashing, exposed fasteners, old sealant, or gaps around curbs.
Penetration details vary by roof type. Asphalt-shingle assemblies often use pipe boots and step flashing. Metal roofs may rely on flexible boots, curbs, closures, butyl tapes, and fasteners. Tile roofs typically need specialized flashing beneath the tile. A correct repair aligns with the system design rather than hiding the area with sealant.
Weak roof edges, drip edge, fascia, or soffit details
Wind pressures peak at edges and overhangs. Water can be driven behind a loose drip edge, under starter shingles, into rake trim, behind fascia, or through a displaced soffit panel. Once inside an overhang, water can migrate into the attic or down an exterior wall.
Edge leaks are easy to misdiagnose. A stain near an outside wall might originate from the roof edge, a gutter issue, a soffit vent, siding, a window head, or a roof-to-wall flashing problem. Accurate diagnosis depends on tracking the path, not guessing the nearest part.
Valley, gutter, or drainage problems redirecting water
Valleys carry concentrated runoff, and gutters collect water at roof edges. During wind-driven rain, debris, overflow, undersized or shifted components, loose gutter aprons, damaged valley metal, or poorly lapped underlayment can divert water into areas that should stay dry.
Overflow at a gutter is not always a gutter-only problem. It can soak fascia, soffits, siding, window heads, and roof-to-wall joints. Wind then pushes that water behind trims or into wall openings.
Damaged underlayment or open roof-deck joints
When the primary covering is lifted, cracked, or missing, the next layer matters. Torn underlayment, deteriorated felt, punctures, poorly sealed laps, or open roof-deck joints can allow water into the attic. IBHS has examined wind-driven rain entry after shingle removal to show how sealed deck strategies can reduce water entry when the covering is compromised.
That does not mean every roof needs the same upgrade. Climate, slope, covering type, attic ventilation, manufacturer instructions, and local codes determine what is appropriate.
Water entering siding or a window and imitating a roof leak
Sometimes the main roof field is dry. Wind-driven rain can enter at siding joints, window-head flashing, dormer walls, wall penetrations, trim joints, or cladding transitions. Building Science Corporation emphasizes that wall claddings and window-to-wall joints must drain effectively even when air pressure affects water movement.
These events often appear near exterior walls, upper-floor ceilings, bay windows, dormers, and chimney chases. If the roof looks intact but nearby wall surfaces are wet, include the wall assembly in the investigation.
What the Wind Direction Can Tell You
Wind direction is one of the better clues for a wind-driven leak, though it remains a clue. It can point you toward the roof slope, wall, chimney face, dormer side, vent, or edge that took the hit. On its own, it does not prove the precise entry point or whether the defect is new or old.
A leak tied to one wind direction
If stains appear only when rain comes from the west, start with west-facing slopes, rake edges, sidewalls, dormers, vents, chimneys, windows, and siding. If a northeast storm is the trigger, pivot to surfaces that face that direction. Keep notes after each event to compare.
Repetition is the useful signal. One storm may be too chaotic to read. Several storms with the same wind direction and the same indoor wet spot make the inspection more targeted.
A leak near an exterior wall, dormer, or chimney
A leak near an exterior wall often traces to a transition such as a roof edge, step flashing, kickout flashing, siding, a window head, a soffit, or a gutter. Near a chimney or dormer, the suspects include roof flashing, wall cladding, trim, masonry, counterflashing, or uphill drainage issues.
Chimneys and dormers receive water from the side during storms. A joint that stays barely damp in calm rain may be hammered repeatedly when wind is involved.
A leak below a ridge, turbine, soffit, or gable vent
A stain below an attic vent may indicate water entered through the vent itself rather than through the surrounding roof covering. Ridge, soffit, gable, off-ridge, and turbine vents can admit water under high-exposure conditions.
The right response is not to stuff the vent closed. A professional may examine baffles, vent type, placement, fastening, weather protection, attic airflow, and any wet insulation or sheathing to guide a fix.
A leak that appears after roof work or a severe storm
If a leak begins after roof work, possibilities include disturbed flashing, unsealed fasteners, shifted siding, damaged vent boots, stray nail holes, debris in valleys, or an incomplete transition detail. After a severe storm, new damage to roofing, vents, edges, or flashing may be involved. In both cases, timing helps focus the inspection but does not answer it fully.
At-a-Glance Wind-Pattern Guide
| Pattern | Likely entry path | Useful clue | Safe check | Professional to call |
| Leak occurs only when wind comes from one direction | Wind-facing roof slope, wall, vent, chimney, dormer, or edge | Same room gets wet in repeated storms | Photograph interior stains and observe the exposed side from the ground with binoculars or zoom | Roofing contractor, home inspector, or building-envelope specialist depending on the area affected |
| Water appears near an outside wall | Step flashing, kickout flashing, siding, window head, soffit, fascia, or gutter edge | Staining follows a wall line or appears above a window | Look for wall staining, loose trim, overflowing gutters, or damaged siding from the ground | Roofer plus siding, window, or exterior-envelope contractor if the wall is involved |
| Drips occur below a ridge, gable, soffit, or turbine vent | Vent opening or vent flashing | Leak appears in wind-driven rain but not in calm rain | View from attic access only if the area is safe and there is an established walkway | Roofer familiar with attic ventilation |
| Leak appears near a chimney or dormer | Step flashing, counterflashing, siding, masonry, trim, or uphill drainage | Water shows on one side after wind hits that face | Ground-level photos of flashing, siding, masonry, and staining | Roofer, chimney professional, mason, or envelope contractor as appropriate |
| Ceiling stain is far from any obvious roof defect | Water traveling along framing, sheathing, ducts, pipes, wires, or insulation | Wet trail visible in attic or wall cavity | Observe only from a safe attic access or walkway without stepping on ceiling drywall | Moisture investigator, roofer, or qualified inspector |
It May Not Be the Roof Field
Many people say “roof leak” for any water that shows up at a ceiling. During wind-driven rain, that assumption can be wrong. Roof-field problems involve the main covering, including shingles, panels, tiles, underlayment, or deck joints. Lookalike leaks enter at walls, windows, dormers, vents, chimneys, soffits, or mechanical systems and then travel to a nearby ceiling before becoming visible.
Siding and window-head leaks
Wind can push rain behind siding, through window-to-wall joints, above window heads, and into trim assemblies. From there, water can run inside a wall cavity and appear at a ceiling below. Building Science Corporation’s work on wind-driven rain and windows underscores that claddings and window joints require drainage and pressure management, not just a surface bead of caulk.
Attic-vent entry without damaged shingles
If the attic uses ridge, soffit, gable, off-ridge, or turbine vents, water can enter through the vent during wind-driven rain even when nearby shingles look sound. The source is the vent opening, baffling, installation, or exposure rather than the surrounding roof covering.
Condensation that happens during storm weather
Storm conditions can coincide with indoor humidity, cold roof sheathing, air leaks, or HVAC operation. Moisture may condense on cold surfaces and drip, especially at metal ducts, fasteners, or poorly sealed attic penetrations. ASHI notes that moisture problems can originate from the envelope, plumbing, or thermal condensation, so the search should extend beyond the roof covering when patterns are unclear.
Plumbing or heating, ventilation, and air conditioning moisture
A drip during a storm may also come from a plumbing line, condensate drain, humidifier, bath fan duct, roof-mounted equipment, or sweating HVAC ducts. Wind can make the timing look roof-related, so a professional should confirm the source when evidence conflicts.
What to Do During a Wind-Driven Roof Leak
Step 1: Keep People Away From Electrical and Ceiling Hazards
- Move people away from wet light fixtures, outlets, switches, ceiling fans, and electrical panels. Do not touch wet electrical fixtures. If water is near electrical equipment, treat the situation as unsafe and contact the appropriate emergency or electrical professional. Do not stand beneath a sagging, cracked, or bulging ceiling, as a wet ceiling can fail without much warning.
Step 2: Protect Belongings and Contain Water if Safe
If conditions are safe, move furniture, electronics, rugs, papers, and valuables out of the wet zone. Use buckets, pans, towels, plastic sheeting, or waterproof bins to catch water. State Farm’s roof leak guidance recommends moving belongings, collecting water, documenting damage, and contacting a contractor as practical first steps.
Do not puncture a ceiling bulge, and do not pull down wet drywall or insulation during the storm. If the ceiling is sagging or actively deforming, leave the area and get help.
Step 3: Record Wind Direction, Rain Intensity, and Timing
Note when the leak started, which room or wall was affected, whether the rain was light or heavy, and which direction the wind was blowing. If you can do so safely, take photos or brief videos of the leak, stains, bubbling paint, wet flooring, and exterior conditions through a window.
These records help a contractor reconstruct the logic of the leak. They do not prove the cause, but they narrow the field.
Step 4: Observe Only From the Ground or a Safe Attic Access
Do not climb onto a wet, windy, or storm-damaged roof. From the ground, use binoculars or a camera zoom to look for missing shingles, lifted edges, damaged flashing, loose vents, gutter overflow, displaced soffit panels, or wall staining. If there is a safe attic access with an established walkway, you may look from there without stepping on ceiling drywall or insulation.
Step 5: Arrange the Correct Professional Inspection
Contact the right professional for the pattern you see. A roofing contractor is the first call for shingles, panels, flashing, vents, skylights, valleys, and roof edges. A chimney professional or mason may be needed for masonry, caps, and counterflashing. A siding, window, or building-envelope contractor may be required if walls, dormers, or window heads are involved. A moisture investigator can help when the source remains uncertain.
Safe Clues You Can Gather After the Storm
What to look for from the ground
After the storm, stay on the ground. Use binoculars, a camera zoom, or safe window views. Look for missing, torn, curled, cracked, or lifted shingles; displaced ridge caps; bent or loose flashing; damaged pipe boots; loose exhaust caps; gutter overflow marks; clogged valleys; wall staining; damaged siding; open soffits; and debris lodged at transitions. Many of these clues can be identified without climbing a ladder.
What to look for from a safe attic location
If the attic is safe to enter and has a proper walkway or platform, look for wet sheathing, dark trails, shiny wet surfaces, damp insulation, stains around nails, wet areas near vents, and moisture along framing near chimneys or dormers. Do not step between joists, and do not enter if you see active electrical hazards, unstable framing, storm damage, extreme heat, poor footing, or any unsafe condition.
What not to touch, open, or test
Do not touch wet electrical fixtures. Do not open ceiling cavities during active leaking unless a qualified professional has made the area safe. Do not walk through wet insulation. Do not perform uncontrolled hose testing, which can overwhelm details that would not normally leak and introduce extra water without clarifying the source.
Why dry weather does not prove the leak is fixed
Intermittent leaks dry up between storms. A dry attic two days later does not confirm the problem is gone. ASHI notes that investigations may require tools and methods to verify whether materials are wet and to map the water’s path because conditions change quickly after an event.
How Professionals Diagnose an Intermittent Wind-Driven Leak
Match the leak to weather and wind direction
A reliable inspection begins with the story. Which wind direction triggers the leak? Does it require heavy rain, strong wind, or both? Does it start early in the storm or after hours of exposure? Is the stain near a wall, vent, chimney, dormer, skylight, valley, or roof edge?
Those answers shape the inspection plan and reduce unnecessary demolition or scattershot sealing.
Trace water through the attic and wall cavities
Professionals follow the path rather than the stain alone. They trace along sheathing seams, rafters, trusses, wall plates, studs, wires, pipes, ducts, and insulation. Water often rides a framing member and drops at the first opening in the ceiling finish.
Inspect roofing, flashing, vents, edges, and cladding
The exterior review should include the roof field, ridge, hips, valleys, eaves, rakes, drip edges, fascia, soffits, gutters, downspouts, pipe boots, exhaust caps, skylights, chimneys, dormers, sidewalls, siding, windows, and wall penetrations. FEMA’s sloped-roof guidance supports this system view because performance in wind depends on how the covering, underlayment, sheathing, edges, vents, drainage, and openings work together.
Use moisture meters and thermal imaging correctly
Infrared cameras detect surface temperature differences, not moisture itself. A cool area may be wet, but shading, insulation variations, or air movement can create a similar image. Moisture meters help confirm whether a suspicious area is actually wet and to what extent.
Conduct controlled water testing when necessary
Controlled testing can isolate a stubborn leak if done carefully. Water is applied to small areas in a planned sequence while someone observes inside. The goal is to reproduce the leak without flooding unrelated details. Broad, uncontrolled spraying muddies the diagnosis and risks extra water entry.
What a Durable Repair Usually Involves
The right fix depends on the entry path. Across systems, the goal stays consistent: restore drainage, attachment, and proper layering so water is directed back outdoors instead of being trapped behind finishes.
Restore damaged or unsealed roof covering
If shingles, panels, tile, slate, ridge caps, or fasteners are damaged, loose, missing, or poorly attached, repair them in a way that aligns with the roof system. For asphalt shingles, that often means replacing damaged tabs, correcting fastening, and ensuring proper sealing. For metal, tile, slate, or specialty roofs, follow the system fastening, lap, flashing, and manufacturer guidance.
Rebuild flashing and roof-to-wall drainage details
Flashing repairs often require removing nearby roofing or siding so layers can be rebuilt in the correct order. Step flashing, counterflashing, headwall flashing, apron flashing, valley flashing, and kickout flashing must direct water onto the drainage plane, not behind the wall. At roof-wall joints, step and kickout flashing must integrate with the roof covering, underlayment, wall drainage plane, cladding, and gutter layout.
Repair or upgrade vulnerable vents
If wind-driven rain is entering through a vent, solutions may include replacing damaged components, adjusting placement, improving baffling, securing the vent, or selecting a vent design that better suits the exposure. Any change must maintain safe attic ventilation and follow local requirements and manufacturer instructions.
Restore underlayment or sealed-deck protection
When water bypasses the primary covering, underlayment and deck protection deserve attention. Asphalt roofing underlayment provides secondary protection during wind-driven rain, and self-adhering products can add resilience at vulnerable areas when they fit the assembly. IBHS sealed-deck concepts can reduce vulnerability after covering loss, though they do not replace the need for sound shingles, panels, flashings, and vents.
Correct soffit, fascia, gutter, valley, or edge problems
Repairs at edges and drainage may involve drip edge, starter courses, rake trim, gutter aprons, fascia, soffit panels, valley metal, gutter alignment, and debris removal. The aim is to keep runoff on the intended path and prevent wind from pushing water behind edge materials.
Repair wall cladding, window flashing, or chimney details
If the entry is through a wall, the work may involve siding, window flashing, trim, masonry, chimney caps, counterflashing, or the wall’s drainage plane. Patching a ceiling stain or swapping random shingles will not stop water that is entering at a window head or dormer wall.
Why Caulk Alone Usually Does Not Solve the Problem
Sealant is useful in the right place, but it is often misapplied to wind-driven leaks. A bead over an unknown joint may hide a gap briefly while the real drainage error persists. Worse, it can trap water behind flashing, siding, or trim.
Durable roof and wall assemblies rely on laps, flashing, underlayment, drainage planes, fasteners, and compatible sealants installed in the right sequence. Sealant cannot substitute for missing step flashing, a damaged pipe boot, a loose vent, an open roof-deck joint, a failed window-head flashing, or a displaced shingle course. If water is being driven by pressure, the repair has to re-establish the path that sheds water to the exterior.
Can a Roof Leak in Wind Without Visible Storm Damage?
Yes. A roof can leak in wind with no obvious storm damage visible from the ground. Wind-driven rain can enter through small gaps, old flashing defects, unsealed shingles, vent openings, siding joints, window-head details, soffits, or penetrations that look ordinary at a glance. There may also be damage that is difficult to see without close inspection.
This helps explain intermittent behavior. The weak point may need a specific wind direction, rain angle, or pressure level before it leaks. Calm rain does not test those same pathways. That does not mean the roof is fine; it means the defect responds to pressure.
How to Reduce the Chance of Another Wind-Driven Leak
Maintain roof covering, flashing, vents, edges, and drainage
Keep the system in working order. Replace damaged shingles or panels, secure ridge caps, maintain flashings, repair cracked pipe boots, keep gutters and valleys flowing, and address loose fascia or soffit materials. These maintenance steps improve resilience but do not guarantee performance in every storm.
Inspect after high-wind events and nearby roof work
After a significant wind event or nearby roofing activity, look safely from the ground for changes. Missing shingles, displaced vents, bent flashings, loose trims, debris in valleys, or new wall staining are worth documenting. Avoid climbing onto the roof to verify.
Plan resilient underlayment and deck details during reroofing
Reroofing is the best time to consider measures that perform better in wind because the covering is off. FEMA and IBHS strategies can reduce vulnerability through improved roof edges, well-integrated flashing, better vent protection, suitable underlayment, and sealed-deck approaches in some assemblies. Suitability depends on roof type, exposure, local requirements, ventilation, and manufacturer instructions.
Keep photographs and weather notes for recurring leaks
Keep a simple log. Record date, time, wind direction, rainfall intensity, leak location, photos, and what dried afterward. Repeated patterns help professionals diagnose intermittent, wind-driven leaks with greater confidence.
When Is a Wind-Driven Roof Leak an Emergency?
Treat the situation as an emergency if water is near electrical fixtures or equipment, a ceiling is sagging or bulging, water is pouring rapidly, structural materials appear damaged, the attic is unsafe, or the leak affects sleeping areas, stairs, hallways, or other places where a fall or impact could occur. Leave unsafe areas and contact appropriate emergency, electrical, roofing, or restoration professionals.
Even a small leak deserves attention, though not every drip calls for panic. Protect people first, contain water only if conditions allow, document what happened, and arrange the right inspection.
Frequently Asked Questions
Why does my roof leak only with wind from one direction?
That wind direction is likely pushing rain against a specific slope, wall, vent, dormer, chimney, edge, or flashing detail. The direction highlights the exposed side, though it does not pinpoint the exact entry path.
Can wind blow rain under shingles?
Yes. Wind can lift loose, damaged, unsealed, or under-fastened shingles and drive water under the laps. Once beneath the shingle layer, water may reach nail holes, damaged underlayment, or open deck joints.
Can rain come through a ridge vent or soffit vent?
Yes. Ridge, soffit, gable, off-ridge, and turbine vents are openings, and wind-driven rain can enter them under certain exposure conditions. The fix should reduce water entry while maintaining needed attic ventilation.
Why does the wall leak when the roof looks fine?
Water may be entering through siding, a window head, a dormer wall, chimney flashing, a soffit, fascia, or a roof-to-wall transition. Wind-driven rain often turns wall and window defects into what appear to be roof leaks.
Can underlayment stop a wind-driven leak?
Underlayment can reduce water entry and offer secondary protection when the covering is challenged. It does not replace the need to repair damaged shingles, flashing, vents, or penetrations. The primary layer must still shed water.
Why is the ceiling stain far from the damaged area?
Water can travel along sheathing, rafters, trusses, framing, wires, pipes, ducts, or insulation before dropping onto the ceiling. The stain marks the exit point, not necessarily where water entered.
Should I test the roof with a garden hose?
Avoid broad or random spraying. Uncontrolled testing can overwhelm details, add water where it would not normally go, and confuse the diagnosis. If testing is needed, it should be controlled, sequential, and monitored from inside by someone who knows which joint is being tested.
Should I climb onto the roof after a windy storm?
No. Stay off wet, windy, or storm-damaged roofs. Use ground-level observations, photos, binoculars, safe interior checks, and professional inspections instead.
Final Verdict
A roof that leaks only during wind almost always has a pressure-sensitive weak point. Wind shifts rain sideways or even upslope, lifts vulnerable edges, forces water through vents and tight joints, pounds chimneys and dormers, and exposes problems at flashing, penetrations, soffits, siding, windows, underlayment, and roof-deck joints. The remedy is to restore the roof-and-wall drainage system, not to mask the stain or coat the nearest gap with sealant. Stay off the roof, document the pattern, use wind direction as a clue, and have a qualified professional trace the actual entry path safely.