
Key Takeaways
- Leaks beside roof vents often trace back to a split plumbing-vent boot, loose or mis-lapped flashing, worn shingles or underlayment, exposed or backed-out fasteners, storm-driven rain, or moisture sources that are not roof leaks at all, such as duct or attic condensation.
- The word “vent” covers several penetrations and devices, including plumbing stacks, static attic vents, turbines, powered attic fans, ridge vents, bathroom or kitchen exhaust caps, and combustion flues for furnaces or water heaters. Identify the exact type before planning a repair.
- Note the timing, wind direction, and where the stain shows up. These clues narrow the search, but they do not confirm origin because water can migrate along sheathing, rafters, pipes, ducts, wires, and insulation.
- Avoid unsafe actions. Do not climb a wet or storm-damaged roof, touch wet electrical fixtures, stand under a bulging ceiling, enter an unsafe attic, dismantle a combustion flue, or spray the roof with uncontrolled hose tests.
- Durable fixes re-create the entire drainage assembly, including the boot or collar, flange or flashing, underlayment, adjoining roof covering, and fasteners placed in the right locations.
The Short Answer: The Vent Opening or Nearby Roof Detail Has Lost Its Water-Shedding Path
If you are asking, “why is my roof leaking around a vent?”, the plain answer is that water is slipping past the roof’s layered drainage at or near a penetration. Typical culprits include a cracked plumbing-vent boot, a flange that is loose or lapped the wrong way, damaged shingles or underlayment around the hole, exposed nails, or storm-driven rain entering a vent. Sometimes the stain comes from lookalikes, including bathroom exhaust condensation, sweating air-conditioning ducts, attic condensation, or moisture associated with a combustion flue. The right repair depends on the vent type because a plumbing stack, attic ventilation product, exhaust cap, ridge vent, and fuel-burning appliance flue are built and serviced differently.
The leak may be in the boot, flange, flashing, fasteners, or surrounding roof covering
Any vent interrupts the roof surface, so water must be guided around that break by gravity. Typically, the upper edge of the flashing tucks under the course above, and the lower edge sheds over the course below. A boot, collar, cap, curb, flange, or housing works in concert with the nearby shingles, tiles, or panels. If a part is cracked, pulled loose, corroded, cut too short, fastened in the wrong place, or smeared with caulk instead of properly layered, runoff can reach the deck and show up indoors.
Water may travel before appearing beside the vent
A stain near a vent is a hint rather than a map. Water can enter at the penetration, run across the underside of sheathing, follow a rafter, drip from fasteners, track along the outside of a pipe, wick through insulation, or ride a wire before it becomes visible. A mark several feet from the penetration can still originate there, and a drip right beside a pipe can begin upslope. Skilled inspections treat the visible mark as the end of the trail, not proof of where it began.
Condensation and plumbing can imitate a roof-vent leak
Not every ceiling drip near a vent is rainwater. Warm, moist bathroom air can condense in a cold duct and drain back toward the fan. Cold supply ducts can sweat in humid attic air. Warm indoor air leaking into a cold attic can condense on the underside of the roof or on nail tips. Combustion flues can also show condensation or venting problems that require specific safety steps. These issues can appear at vents and grilles even if exterior flashing is correct.
First, Identify Which Vent Is Leaking
Pin down the vent type before choosing a fix. Homeowners often apply “vent” to several different penetrations, but each manages water differently. A plumbing stack carries sewer gases outdoors. An attic vent exchanges air in the attic. A bathroom or kitchen exhaust cap terminates a duct. A combustion flue carries appliance exhaust. Treating them all like a generic roof pipe can create the wrong repair. For combustion equipment, it can also create a safety risk.
Plumbing stack vent
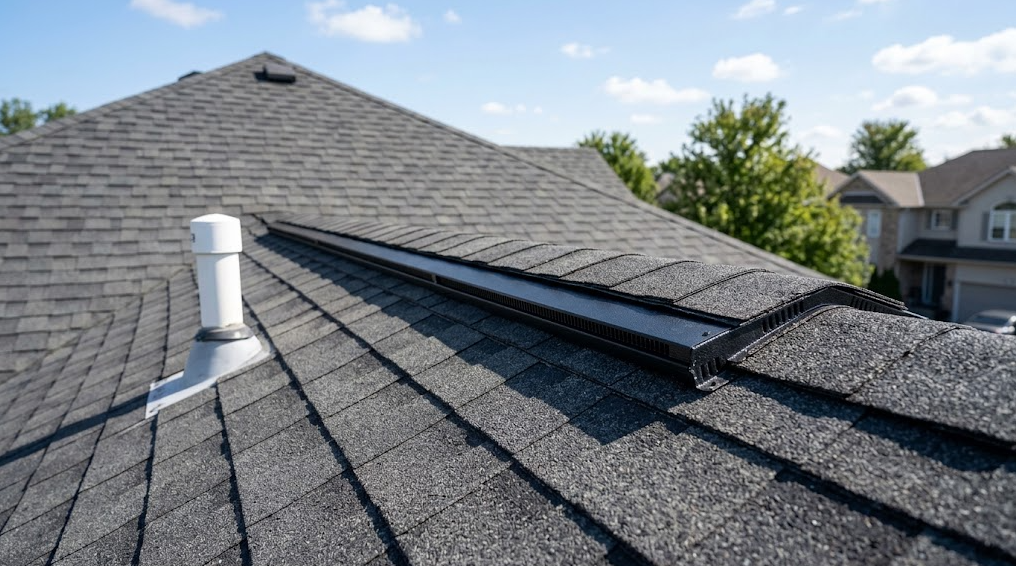
A plumbing stack vent is typically a round pipe through the roof: often PVC, cast iron, or copper. The standard roof detail uses a boot or flashing assembly that seals to the pipe and integrates with the roof covering. Failure spots include a split rubber collar, separation between boot and pipe, an exposed or mis-lapped flange, and deteriorated shingles nearby.
Static box or louver vent
A static box vent: also called a turtle or louver vent in some areas: serves attic ventilation. It has a metal or plastic body with a flange that tucks under and over the surrounding covering. Leaks can start at the flange, seams, fasteners, damaged louvers, or adjacent shingles. Under certain winds, rain can be forced through the opening even if flashing is not the primary defect.
Turbine or powered attic vent
A turbine has a spinning head; a powered attic vent includes a fan and housing. Both require an opening and a flashing flange. Turbines can leak if the rotating head, cap, base, or surrounding flashing is damaged or shifted. Powered units can leak at housings, covers, fasteners, wiring penetrations, or flanges. Because these devices ventilate the attic, the remedy should not be to block airflow just to stop water.
Ridge vent
A ridge vent runs along the peak under cap shingles or a similar cap detail. It can leak if caps are damaged, the vent loosens, fasteners back out, end plugs or closures are missing, or storm-driven rain enters. The system also depends on adequate intake, often at soffits, so any change should consider the whole ventilation path.
Bathroom or kitchen exhaust cap
A bathroom or kitchen exhaust cap terminates a duct at the roof. It may look like a small hood or low-profile cover. Water can enter at the cap’s flange or fasteners, but drips from a bathroom fan often trace to duct condensation after showers in cold weather. Kitchen ducts add grease and fire-safety concerns, so the duct and termination must match the appliance and local rules.
Furnace or water-heater combustion flue
A combustion flue serves a fuel-burning furnace, boiler, water heater, or similar appliance. Moisture near this penetration could involve exterior flashing, but the vent also carries exhaust. Do not dismantle, patch, or re-route a combustion flue. If a carbon monoxide alarm sounds or exposure is suspected, leave immediately and follow emergency or fire-department guidance. Both a roofing contractor and qualified heating, ventilation, and air conditioning (HVAC), chimney, or fuel-appliance professionals may be needed.
At-a-Glance Vent Diagnosis Guide
| Vent type | Likely failure point | Timing clue | Interior clue | Professional to call |
| Plumbing stack vent | cracked boot, failed collar, loose flange, damaged surrounding roofing | often during rain, especially long or wind-driven storms | stain near a pipe chase, wall, or ceiling penetration | roofing contractor, with a plumber if the pipe itself is defective |
| Static box, louver, turbine, powered attic vent, or ridge vent | flange, cap, housing, fasteners, closures, nearby shingles, or wind-driven entry | may show up only in heavy rain from a specific direction | damp roof deck, wet insulation, or stains below attic ventilation paths | roofing contractor experienced with attic ventilation |
| Bathroom or kitchen exhaust cap | roof cap flashing, duct connection, missing insulation, disconnected duct, or poor termination | dripping after showers, cooking, or cold nights suggests condensation | water at a fan grille, along the duct run, or in a nearby ceiling stain | roofer for exterior flashing, HVAC or ventilation contractor for duct issues |
| Furnace or water-heater combustion flue | storm collar, roof flashing, cap, corroded vent, poor draft, or condensation inside venting | rain-related stains often point to flashing, while moisture linked to equipment use can involve venting | rust, staining near the flue, soot, unusual condensation, or concerns near the appliance | roofer plus qualified HVAC, chimney, or fuel-appliance professional |
| Non-roof moisture source near a vent | attic air leaks, cold ducts, plumbing above the ceiling, or humid indoor air reaching cold surfaces | moisture during dry spells, cold snaps, or long cooling cycles | damp insulation, frost on nails, sweating duct, or water from a grille | home inspector, roofer, insulation and air-sealing contractor, HVAC contractor, or plumber, depending on what the inspection finds |
9 Common Reasons a Roof Leaks Around a Vent
The question “why is my roof leaking around a vent” spans several roof assemblies and more than one moisture source. The nine patterns below are frequently seen in the field, but each case still needs verification. A single stain can result from overlapping causes, especially on older roofs or after storms.
The plumbing vent boot is cracked or missing
A plumbing vent boot usually combines a flat flange with a flexible collar that seals to the pipe. Sun exposure, temperature swings, roof movement, impacts, poor installation, and age can cause rubber or plastic to split, shrink, curl, or detach. Once the collar opens, rain can run down the outside of the pipe and into the attic or wall cavity. GAF calls out damaged collars and flashing as common sources of plumbing-vent leaks, and the International Association of Certified Home Inspectors (InterNACHI) notes that rubber or plastic boots can dry, crack, or be absent.
The vent flange or flashing is corroded, loose, or mis-lapped
Flashing is not a single metal plate. It is part of a layered system. On most steep-slope roofs, the upslope edge of a vent flange should be covered by the course above, and the downslope edge should shed over the course below. If a flange sits on top of all shingles, is tucked under the wrong course, is bent upward, is corroded, or has been loosened by movement, it can channel water under the covering instead of over it.
Surrounding shingles or underlayment are damaged
Sometimes the vent detail is not the only issue. Missing, cracked, curled, punctured, or poorly cut shingles around a penetration allow runoff to reach the underlayment and deck. If the underlayment at the opening is torn or deteriorated, water may bypass visible flashing and appear inside. Replacing only the boot while leaving failed adjacent covering in place often does not restore the intended drainage path.
Exposed nails or old fastener holes are admitting water
Exposed fasteners near a vent can rust, loosen, and leak through enlarged holes. On asphalt shingle roofs, GAF Technical Services defines exposed nails as fasteners placed on the shingle face or below the fastening line, and notes that movement can widen the opening. For that asphalt shingle condition, GAF’s remedy is to remove and replace the affected shingle rather than rely on caulk or roof cement as a lasting fix. That instruction applies to the specific shingle system and is not a universal rule for tile, metal, slate, or other coverings.
Sealant has cracked or was used instead of proper flashing
Sealant belongs only where a manufacturer detail allows it. It should not be the main defense against roof runoff at a penetration. Caulk, roofing cement, and tar exposed to sunlight and movement may crack, shrink, split, or peel. A vent installed by cutting shingles tight to a pipe and smearing sealant over the joint lacks the shingle-style overlap that sheds water by gravity, making leaks likely.
Debris is holding water behind the vent
Leaves, needles, seed pods, broken branches, and roofing scraps can pile up behind a vent, especially on low-slope sections or behind wide housings. Debris slows drainage, traps moisture, and can push water sideways under laps that would otherwise shed. This does not prove the vent is defective, but it may expose weak flashing, lifted shingles, or old fastener holes. Debris around attic-vent products can also restrict airflow, so cleaning should avoid crushing louvers, caps, or screens.
Wind-driven rain is entering the vent opening
Under strong winds, a vent can admit rain even if it stays dry in calm weather. The Federal Emergency Management Agency (FEMA) identifies ridge vents, gable vents, off-ridge vents, soffit vents, turbines, and similar openings as potential wind-driven rain entry points in high-wind regions. Solutions can include wind-resistant vent designs, closures, baffles, fastening, and installation corrections, while maintaining required attic ventilation. Pay attention when a leak appears only during storms from a particular direction.
The vent is poorly located or the roof drains slowly
Certain locations see more water. Valleys gather runoff, snow, and debris. Low slopes drain more slowly. A vent set close to a valley, sidewall, obstruction, or transition can receive more flow than a basic detail can handle. InterNACHI points out that penetrations in valleys carry higher leak risk because valleys concentrate water. A durable fix may involve rebuilding the detail, relocating the penetration when practical, or using a manufacturer-approved flashing system suited to the slope and roof type.
Storm, snow, or roof work moved the vent assembly
- High winds, sliding snow, fallen limbs, foot traffic, or other roof work can shift a vent, loosen fasteners, bend flashing, crack sealant, or disturb connections below the roof deck. In cold climates, moving snow can bend vents. Work around combustion vents deserves extra care because sections can be dislodged inside the attic. If the vent serves a fuel-burning appliance, address both water control and exhaust safety.
It Might Be Condensation, Not Rain
Stains near a vent often get blamed on flashing because the hardware is visible. Condensation is quieter. It can form inside a duct, on the outside of a cold duct, on sheathing or nail tips, or inside a combustion vent. Timing helps but does not prove origin. Drips in dry weather, stains that peak during cold spells, or water linked to showers and long cooling cycles call for a closer look beyond the roof covering.
Bathroom exhaust duct condensation
Bathroom fans move warm, humid air. When that air runs through an uninsulated duct in a cold attic, moisture can condense inside and flow back toward the fan or drip from low spots. A disconnected, crushed, poorly sloped, or improperly terminated duct can also dump humidity onto attic surfaces. Sealing and insulating exhaust ducts in unconditioned spaces reduces risk, and bathroom and kitchen exhaust should discharge outdoors.
Air-conditioning duct sweat near a ceiling register
Cold supply ducts or boots can sweat when humid air contacts them. This often shows up near a ceiling grille rather than directly beneath a roof opening. Drips may coincide with long cooling cycles, muggy weather, or elevated attic humidity. It is easy to misread this as a roof leak because the stain is overhead. A roofer may find no exterior defect, while an HVAC contractor may find missing insulation, air leakage, or condensation on the register boot.
Attic condensation on sheathing and nails
Warm indoor air can escape through gaps at light fixtures, attic hatches, plumbing chases, fan housings, and other penetrations. When that air reaches cold sheathing, moisture or frost can form, later dripping onto insulation and ceiling drywall. Building Science Corporation emphasizes that the attic behaves as a connected system and that air sealing typically precedes or accompanies ventilation improvements. Adding exhaust without adequate intake can even draw more indoor air into the attic through ceiling leaks.
Combustion-flue condensation or venting failure
Rust, staining, or moisture at a combustion flue is not always about roof flashing. Fuel-burning appliances must vent outdoors and should be serviced by qualified professionals. Carbon monoxide is colorless and odorless: do not rely on smell. If an alarm sounds or exposure is suspected, evacuate and follow emergency guidance. Do not dismantle a flue, tape a joint, remove a cap, or adjust appliance venting yourself.
What Timing and Location Can Tell You
Timing and location sharpen the hypothesis but do not confirm it alone. A drip that occurs only in rain points toward exterior entry, yet condensation can also happen during storms when conditions align. Dripping in dry weather suggests ducts, plumbing, appliances, or attic condensation, though trapped water from a past storm can release later. Use timing as a starting point for investigation.
Leaks only during heavy or wind-driven rain
If water shows up only in hard rain or only with wind from one direction, expand the search to include a vent cap, ridge vent, turbine, louver, or other attic-vent opening in addition to flashing. Wind alters pressure and rain direction. It can push water under laps, through louvers, or into openings that stay dry in calm rain. Note the windward roof slope, storm direction, and affected rooms for the inspection.
Drips after showers or long air-conditioning cycles
Drips from a bathroom fan after showers often implicate exhaust-duct condensation, particularly in cold weather. Drips near a ceiling register after long cooling runs suggest duct sweat. These patterns do not rule out a roof leak, but they steer the first questions: Was it raining? Was the fan used? Did the air conditioner run for hours? Did dripping stop when the equipment cycled off?
Moisture during cold weather without rain
Cold-weather moisture without rain often indicates attic condensation, frost melt, or duct sweat. Look for frost on nail tips, damp sheathing, wet insulation under air leaks, and stains around ceiling penetrations. Corrections usually involve air sealing at the ceiling plane, insulation alignment, duct repairs, humidity control, and ventilation balanced for both intake and exhaust: not just a new roof vent.
Stains beside a pipe versus water from a ceiling grille
A stain beside a plumbing pipe chase could come from a failed boot, but it might also be water traveling down framing or along the pipe from higher up. Water from a bathroom fan grille could be roof-cap flashing, or it could be condensation inside the duct. Water from an HVAC grille can be duct sweat or a drainage issue at the air handler. The visible drip point is often the end of the path rather than the entry.
What to Do Right Away
Focus first on safety and limiting damage. Do not try to fix the roof detail mid-storm. Wet materials, electricity, sagging ceilings, slick roof surfaces, and combustion vents can all be hazardous. Take only safe, limited steps until a roof, attic, duct, or flue inspection is possible.
Step 1: Keep People Away From Electrical and Ceiling Hazards
Do not touch wet light fixtures, switches, fans, smoke alarms, or wiring. Keep clear of any ceiling that is sagging, bulging, or cracking; saturated drywall can release suddenly. If water is near electrical equipment, contact the appropriate emergency, electrical, or utility professional. If a carbon monoxide alarm sounds, evacuate and follow emergency or fire-department guidance.
Step 2: Protect Belongings and Contain Water if Safe
If conditions are safe, move furniture, electronics, rugs, and stored items out of the wet area. Use buckets, pans, towels, or plastic sheeting to limit damage. Do not stand under a bulging ceiling to puncture it. If water nears electrical fixtures or the ceiling appears unstable, leave the area and get help. Take photos if you can do so safely.
Step 3: Record the Weather, Equipment Use, and Timing
Note when the leak started, the rain intensity, the wind direction if known, and whether a bathroom fan, kitchen exhaust, furnace, water heater, or air conditioner was running. Track whether the drip stopped after the storm or continued. Photos and short videos help, especially if the area dries before a professional arrives.
Step 4: Look Only From the Ground or a Safe Attic Access
Use binoculars or a phone zoom from the ground. You may spot a missing cap, lifted shingle, displaced vent, debris, or visible storm damage. If attic access is safe, dry, and well lit, look from the platform or walkway only. Do not enter an unsafe attic, step on ceiling drywall, crawl through wet insulation, or climb onto a wet or storm-damaged roof.
Step 5: Call the Correct Professional
Call a roofer for exterior flashing, boots, shingles, underlayment, roof vents, and storm damage. Call an HVAC or ventilation contractor for sweating ducts, disconnected bath fans, powered attic vents with electrical parts, and combustion-appliance venting. Call a plumber if the pipe itself leaks or is loose. For a combustion flue, a roofer may handle roof flashing, while qualified HVAC, chimney, or fuel-appliance professionals assess the venting and appliance.
Safe Checks You Can Make
Safe checks gather clues without creating new damage or hazards. Observe first and leave hazardous repairs to qualified professionals. Avoid any action that could worsen the leak, cause a fall, trigger an electrical issue, collapse a ceiling, or compromise combustion safety.
Ground-level exterior clues
From the ground, look for missing shingles, lifted ridge caps, bent vent caps, displaced turbine heads, loose pipe boots, missing storm collars, debris held behind a vent, damaged gutters, and stains on siding or fascia. Binoculars help. Do not climb for a closer look after rain, in wind, on wet shingles, when damage is visible, or if roof access is uncertain.
Attic clues near the vent path
From a safe attic access, look for wet decking, darkened sheathing, shiny water trails, damp insulation, rusted nails, frost, a wet pipe, a disconnected duct, or stains below a penetration. A plumbing-vent leak may leave water around the pipe. A bath-fan problem may show a wet duct or water at the fan housing. Attic condensation tends to be more widespread, often on cold sheathing or nail tips.
What not to touch or dismantle
Do not pull apart a combustion flue, remove a furnace or water-heater vent cap, tape flue joints, handle wet electrical components, open powered attic-fan wiring, cut wet ceiling drywall under a bulge, or soak the roof with a hose to “test.” Move in attics only where framing or a proper walkway supports you. Ceiling drywall will not hold body weight.
Why the ceiling stain is not a reliable roof map
Water often travels before it appears. A hallway light dripping might trace back to a ridge vent, pipe boot, valley, or exhaust cap. Insulation can absorb and release water slowly. Wood can spread moisture along the grain. Wires, pipes, and ducts can carry droplets across the attic. Professionals track the path backward from wet materials rather than assuming the stain sits below the hole.
How Professionals Find the Exact Vent Leak
A thorough inspection separates roof entry from plumbing leaks, duct condensation, attic moisture, and combustion-vent issues. It also examines the entire assembly around the penetration rather than stopping at the first obvious flaw.
Identify the vent and trace the moisture path
The inspector confirms the vent type and what it serves. A plumbing stack, ridge vent, turbine, box vent, exhaust cap, powered fan, and combustion flue have different failure points. Then the inspector traces moisture from the interior mark toward the roof deck, duct, pipe, or appliance path. Damp insulation may need careful movement to see the deck; unsafe attic conditions may delay this step.
Inspect flashing overlap, fasteners, shingles, and underlayment
On the roof, a professional reviews the boot or collar, any storm collar, the flange, overlaps, fastener placement, exposed nails, cap condition, nearby shingles or other covering, accessible edges of underlayment, and evidence of prior sealant repairs. Lap direction matters because each layer must shed water to the course below. Excess tar around a vent often covers a failed flashing assembly that needs rebuilding.
Confirm moisture-meter and thermal-imaging clues
Thermal imaging highlights temperature differences that may indicate wet materials, missing insulation, air leaks, or evaporation. It does not confirm moisture by itself. A moisture meter verifies whether a suspect area is actually wet. Guidance from the American Society of Home Inspectors (ASHI) emphasizes that moisture can originate from the envelope, plumbing, or thermal condensation, and that tools must be interpreted together.
Use controlled water testing when necessary
Controlled testing can help when the leak is inactive and the roof is safe. The key is control. Water is applied methodically to small areas while someone observes inside. Randomly blasting a roof with a hose can force water into vents that do not leak under normal rain, flood the assembly, confuse the diagnosis, and increase interior damage.
Check plumbing, ducts, humidity, and combustion venting
If roof details appear sound, the search continues. The source may be a sweating duct, disconnected exhaust fan, plumbing leak, attic air leakage, high indoor humidity, or a combustion-vent problem. For fuel-burning appliances, the roof flashing and appliance venting are separate responsibilities that may require separate trades. A patch at the roofline does not verify combustion safety.
What a Lasting Repair Usually Involves
A lasting repair restores the full water-shedding assembly. That typically includes a correctly sized boot or collar, properly lapped flange or flashing, intact underlayment, sound surrounding roof covering, and fasteners placed where the system requires them. If moisture stems from ducts or attic conditions, add duct sealing and insulation, air sealing at the ceiling, ventilation balancing, or appliance-vent corrections as appropriate.
Replacing a failed plumbing vent boot
Common practice is to remove nearby covering as needed, install a boot or flashing that matches the pipe size, roof slope, and roofing material, then re-lap the surrounding courses correctly. The collar must fit the pipe, and the flange must integrate with the layers so water flows around the pipe and over the downslope course rather than under the covering.
Rebuilding the flange and flashing detail
If a flange is bent, corroded, mis-lapped, or nailed in the wrong spots, a reliable fix usually lifts or replaces neighboring courses and rebuilds the flashing detail. Smearing sealant along the exposed edge may slow a drip for a while, but it does not recreate the layered path. Where a vent sits in a demanding location: near a valley or slow-draining area: a more durable manufacturer-approved detail or, in some cases, relocation may be recommended.
Replacing damaged asphalt shingles and exposed-fastener areas
Replace damaged shingles around the vent so the surface sheds water as designed. For asphalt shingle exposed-nail defects addressed in GAF’s bulletin, the stated remedy is to remove and replace the affected shingle; caulk or roof cement over the nail is not a permanent fix. Other roof materials follow their own manufacturer instructions and fastening rules.
Repairing an exhaust-cap or attic-vent assembly
A leaking exhaust cap or attic vent may need a new cap, housing, flange, fasteners, gasket, screen, damper, or adjacent covering. Turbines and powered units may also require mechanical service. Ridge vents may need new cap shingles, closures, end plugs, or fastening corrections. Keep the ventilation function intact: blocking an attic vent to stop wind-driven rain can create moisture problems elsewhere.
Correcting duct condensation and attic moisture
If condensation is the driver, the work shifts inside. Bathroom and kitchen exhausts should terminate outdoors and be sealed and insulated where they pass through unconditioned spaces. Cold air-conditioning ducts may need sealing, insulation repair, or humidity adjustments. Attic condensation fixes often combine air sealing at the ceiling, insulation improvements, and a ventilation strategy with both intake and exhaust that work together.
Handling combustion flues safely
Treat combustion flues with care. A roofer can replace or repair roof flashing around the flue, but vent connectors, draft, appliance operation, corrosion, condensate handling, clearances, and the full exhaust path should be reviewed by qualified HVAC, chimney, or fuel-appliance professionals. If a carbon monoxide alarm sounds, evacuate and follow emergency guidance. Do not attempt flue repairs yourself.
Why Caulk Alone Often Fails
Caulk, roofing cement, and tar are tempting because they seem quick and easy to inspect. They also face sunlight, temperature swings, roof movement, and dirty surfaces. Over time they can crack, shrink, lose adhesion, or trap water. More importantly, sealant does not recreate the layered overlap that lets a sloped roof shed water. Proper vent repairs integrate flashing and roof covering so water naturally flows down and out. Sealant may appear in a manufacturer-approved detail, but it is not a stand-in for a boot, collar, flange, flashing, underlayment, sound roof covering, and correctly placed fasteners.
Can I Repair a Roof Vent Leak Myself?
Many homeowners can safely protect interiors, take photos, move belongings, and observe from the ground. Roof repair is different. Sloped roofs present fall risks; wet or storm-damaged surfaces are especially dangerous. A vent repair may require lifting shingles without breakage, selecting a compatible boot or flashing, replacing underlayment, placing fasteners precisely, and maintaining attic ventilation. If the vent connects to a powered fan, kitchen exhaust, or fuel-burning appliance, electrical, fire, or combustion hazards may exist. Avoid climbing a wet roof, blasting hose tests, opening powered-fan wiring, or dismantling a combustion flue. If a minor issue is accessible from a safe location, follow the manufacturer’s instructions and local requirements. Otherwise, call the appropriate professional.
How to Help Prevent Roof-Vent Leaks
Prevention focuses on keeping drainage paths open and spotting small defects early. It also treats the roof, attic, ducts, and indoor moisture as connected parts of the same building system.
Inspect penetrations after severe weather and roof work
After high wind, hail, fallen branches, heavy snow movement, or roof projects, look from the ground for shifted vents, bent caps, missing ridge caps, damaged shingles, loose turbine heads, or debris piled against penetrations. Work near combustion vents can disturb sections; if there is any concern, have the venting side checked by the appropriate qualified professional.
Keep drainage paths and vent openings clear
Keep gutters, valleys, and safely accessible roof areas clear. Have a professional handle anything unsafe. Debris stacked behind vents slows drainage and holds moisture against flashing. Vent openings should function freely, not clog with leaves, nests, or improvised sealants. Do not block attic ventilation to stop leaks unless a qualified professional provides a remedy that preserves required airflow.
Maintain exhaust ducts, air sealing, and attic ventilation as a system
Bathroom and kitchen exhausts should vent outdoors, never into the attic. Ducts in unconditioned spaces must be sealed and insulated to limit condensation. The attic floor should be air sealed to prevent warm indoor air from leaking into cold spaces. Ventilation should include both intake and exhaust that work as a pair. Fixing one piece in isolation can leave the true moisture source untouched.
Preserve repair records and photographs
Save photos of stains, active drips, roof conditions, vent locations, attic findings, and completed work. Keep product information for new boots, vents, shingles, caps, or flashing components. Records help future inspections connect changes to results and distinguish an old, repaired stain from a new moisture event.
When Is a Roof-Vent Leak an Emergency?
Treat the situation as urgent when water is near electrical fixtures or panels, the ceiling sags or bulges, water enters rapidly, visible storm damage exists, the structure might be compromised, or a combustion-flue problem is suspected. Stay out from under unstable ceilings. Do not touch wet electrical equipment. Do not climb onto the roof during or right after a storm. If a carbon monoxide alarm sounds or exposure is possible, evacuate and follow emergency or fire-department guidance. Even when hazards are not active, prompt professional evaluation is smart because insulation, decking, ducts, or framing can hold moisture after the visible drip stops.
Frequently Asked Questions
Why does my plumbing vent pipe leak when it rains?
Common reasons include a split boot collar, a loose or mis-lapped flange, damaged shingles nearby, or exposed fasteners around the boot. Water then runs down the outside of the pipe and appears near a wall, ceiling stain, or pipe chase. The remedy typically replaces the boot or rebuilds the flashing and surrounding courses rather than just applying caulk.
Why is water dripping from my bathroom ceiling fan?
It could be a roof-cap issue, but often it is condensation inside the exhaust duct. Warm shower air condenses when the duct runs through a cold attic. A disconnected, uninsulated, sagging, or poorly sloped duct can collect water and release it at the fan grille. If dripping follows showers during dry weather, have both the duct and roof cap checked.
Can rain enter through an attic vent even if its flashing is intact?
Yes, in some storms. Wind-driven rain can enter ridge vents, turbines, louvers, gable vents, and other ventilation openings, especially in high-wind exposure. That does not mean every storm-related leak is acceptable. Evaluate vent design, closures, baffles, fastening, roof slope, and installation while preserving attic ventilation.
Can roof cement or caulk stop a vent leak permanently?
Generally no. Sealants may slow water temporarily but do not replace a proper boot, collar, flange, flashing lap, underlayment, roof covering, or correctly placed fasteners. For a specific asphalt-shingle exposed-nail defect, GAF’s bulletin calls for shingle replacement; it does not treat caulk or roof cement as a lasting solution.
Why is the stain several feet from the roof vent?
Water often migrates before it appears inside. It can follow sheathing, rafters, pipes, ducts, wires, or insulation. The stain you see may be downslope, along framing, or at the lowest drip point. Timing and location help narrow the search, but they do not prove the source.
Who should inspect a leak around a furnace or water-heater vent?
A roofer should check and repair roof flashing if rain is entering around the flue. A qualified HVAC, chimney, or fuel-appliance professional should evaluate the combustion venting and the appliance. Do not attempt flue repairs. If a carbon monoxide alarm sounds, evacuate and follow emergency guidance.
Should I climb onto the roof to inspect the vent?
Avoid it if the roof is wet, storm-damaged, steep, high, icy, fragile, or unfamiliar. Use binoculars or a camera from the ground and call a professional. Falls are a significant risk, and walking near a vent can damage shingles, flashing, or already weakened areas. Safer homeowner tasks include interior protection and documentation.
Final Verdict
A leak near a vent typically means the water-shedding path failed at a penetration, nearby covering, or fastener, though stains can also come from duct condensation, attic moisture, or combustion-vent issues. Identify the vent first, then treat timing, wind direction, and stain location as clues rather than proof. Reliable repairs re-create the full assembly, including the boot or collar, flange or flashing, underlayment, surrounding roof covering, and correctly placed fasteners. If the vent connects to a bathroom fan, kitchen exhaust, powered attic vent, HVAC duct, or fuel-burning appliance, more than one trade may be needed. Stay off wet roofs, steer clear of electrical and ceiling hazards, and leave combustion flues to qualified professionals.